The term voice-changing in post-production or video enhancement means converting the value of the pitch or tone of the soundtrack from a clip or adding some distortions to configure the output genres of voice. Nowadays, it is not rare to find kinds of normal voice modes that people select to change the voice into like Male-to-Female, Robot, Monster, Joker, Soldier, or Baby, which add extra funnies and needed privacy to the video content. If you want to get how to change your voice in a video in an easy method, the three best voice changers with clear users guide introduced below will be helpful. Learn the tutorials!
- Best Voice-Changing Software to Change Voice from Video in Windows/Mac
- How to Transform Voice in Your Video Clip with an Online Video Editor
- An App that Changes Voice in Video for Both Android and iPhone
- 6 Tips to Make the Voice Sounds Better after Changing
- The Bottom Line
VideMake Video Voice Editor to Change Your Voice in a Clip Easily
Simply download this software, add your video to timeline and change audio pitch can change the voice in your video with VideMake Video Editor, which is made for multi-purposes like adding texts and overlaying filters. Both Windows and Mac users can use the free trial of this tool for making videos.
VideMake is a non-linear video editor, so you find it easy to click the buttons to launch the built-in functions even without acting like a pro. Other than changing voice, users can choose to increase/decrease the volume, set fading-in/-out effects, add a new voice-over by mic or headphone, convert bit rate and frame rate, and define the output audio format like MP3 and FLAC.
VideMake Video Voice Editor
- Supports all popular formats of music and video
- Increase the background voice volume permanently
- Free sound resources and effects in built-in library
- Add a voice-over or narration with mic/headphone
- Change voice easily just by sliding the pitch values
- Download content in any normal media format
How to Change Voice in Video by VideMake for Windows and Mac
Operate VideMake software installation. Lauch it and import video
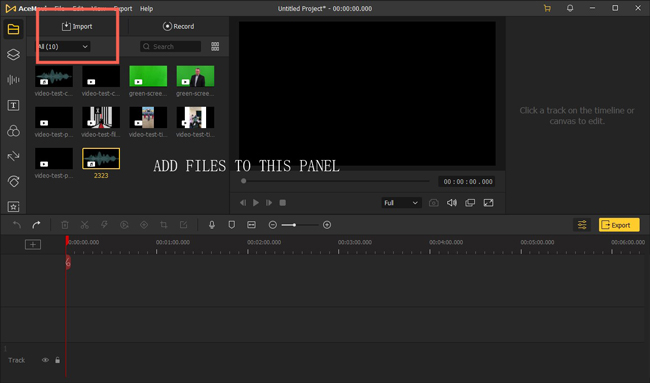
Get VideMake Video Editor here. VideMake is lightweight software that can be downloaded without too much effort. After that, click "Import" to input your video to the Media plate and then add the file thumbnails to the timeline area.
Go to "Properties" &g; "Audio", and adjust the "Pitch" slider based on needs
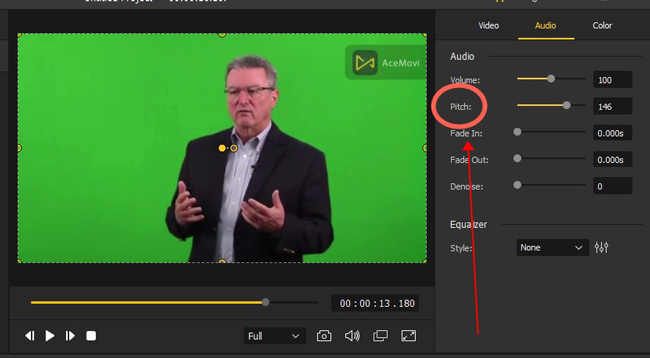
To change the pitch for changing voices, go to "Properties" > "Audio", and you find the option on the screen. You can play the video in real time while controlling the pitch value to check the effect. If you don't like it, you can redo the operation and adjust the degree again.
Pick the output format. Set advanced audio settings to your file
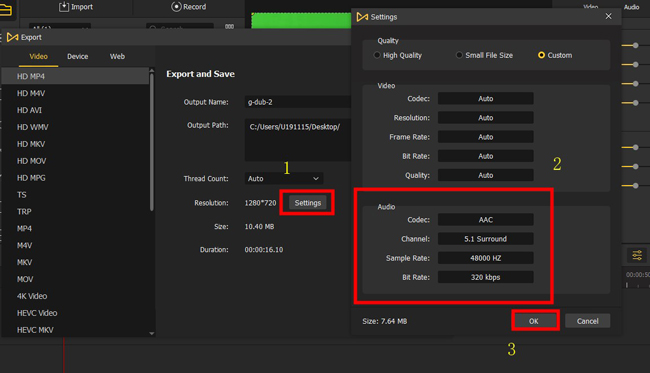
When it comes to downloading your video, tap on the yellow "Export" icon from the interface. You see the output format and save path directly. To perform advanced audio settings, click on "Settings" and then you can change the bit rate, frame rate, codec, and channel as per your needs.
How to Change Voice in a Video Online Free by Media.io
Want to find the best online voice changer for enhancing the audio in a video? In fact, it is uneasy to get online tools that support both professional video and audio editing. But Media.io makes itself good enough for this mission. This program is fully web-based and offers voice changer, audio compressor, audio-to-text generator, music visualizer, and vocal remover. Here is the guide to using the built-in voice changer.
Enter Media.io website. Pick up "Voice Changer" from "Audio Tools"
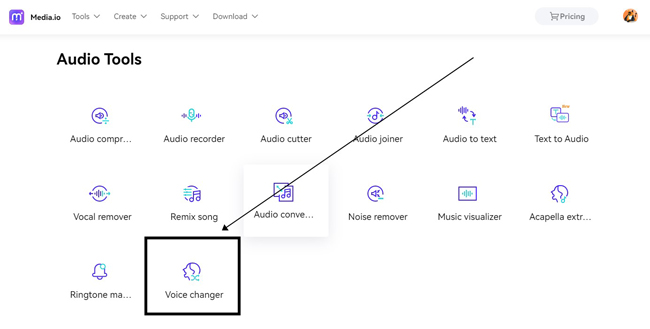
When getting into the interface of Media.io, you find multiple video and audio making functions on the menu. Click "Audio Tools" and pick up "Voice Changer" from the function pool. Then the specific panel for changing voice will pop up before you.
Upload a video. Select the voice style you want to change into
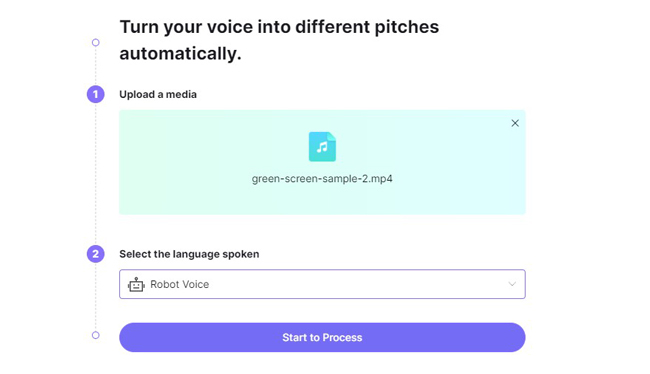
Click the uploading area to add your video to this tool. Then pick up the target voice style you need like Female and Robot. When it is over, click "Start to Process" to operate the voice-changing process.
Play the edited video and export it online by clicking "Download"
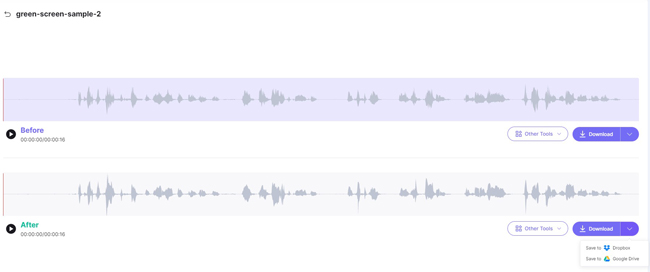
In the final webpage of the process, you can compare the differences between the previous file and the voice-changed video. If you like the changes, download them to your computer, or save the file to Dropbox or Google Drive. However, you need to operate the steps once again for changing the voice style to others.
The Best App to Change Your Voice in a Video on iPhone and Android - KineMaster
Which is the best app for changing the voice in videos? If you want to know the answer, just keep reading. KineMaster is wonderful in making videos as well as enhancing audio, which is alive with pre-made video templates that help you generate content quickly. Voice conversion is one of the popular functions on this voice changer app for both iPhone and Android. Now, let's learn it together.
Download KineMaster to your phone. Click "Create New" to begin
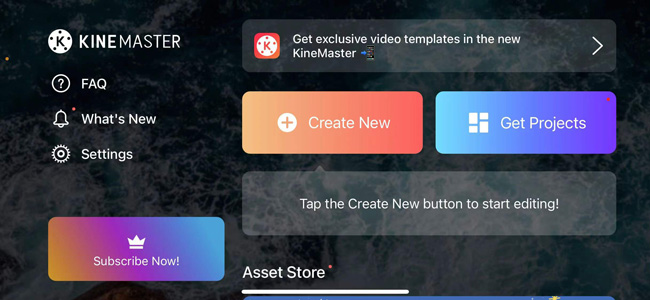
First thing first, download and use this voice changer app on your phone. With that said, both Android and iPhone can operate KineMaster. But there will be a watermark after exporting no matter the resolution you set. When you're ready, click "Create New" to begin the work.
Highlight video clip and choose "Voice Changer" from toolbar
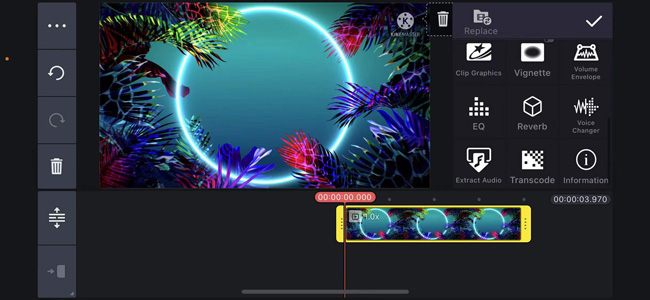
You need to choose the video clip imported to the timeline. And hit the toolbar to choose the "Voice Changer" tool.
Set the voice your want to change into from "Voice Changer"
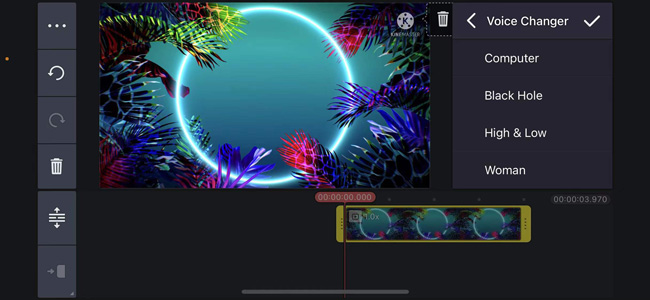
Now pick up the voice style from "Voice Changer" based on your requirements. What makes this app different from other voice changing apps is that you can play the video and listen to the voice changes in real time without losing frames. Switch the voice styles if you dislike the current one. You can choose to change the male voice to female here.
Download video to your phone. Share it on social media platform
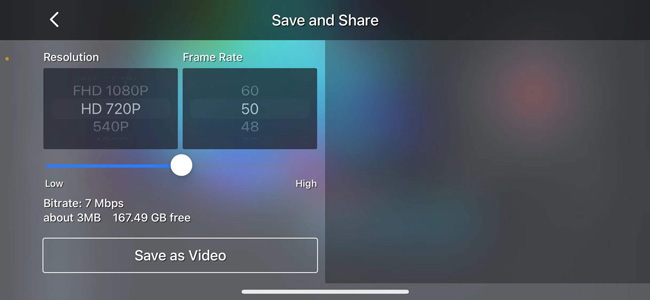
Here is the last step. You need to click "Export" to be prepared to export the project. It is allowed to set the video resolution like HD 720P as well as change the frame rate such as 60 FPS. You see metadata on the screen containing bitrate, size, and quality.
6 Tips for Making the Voice-Change in a Video Better
1. Control the initial volume rather than let your audiences control it themselves
A lot of content creators hold that the voice volume is not so significant for a video because audiences can adjust the volume even if the original value is too high or too low. You need actually control the volume of the background soundtrack in a video at the very beginning because that is a part of creating a good one to upload on social media or share with others. Currently, most video editing software is able to manipulate the volume from 0 to 200%.
2. Do not overuse video audio equalizer
EQ, a.k.a equalizer, is the tool for changing audio tonal quality which generates and reduces frame frequencies based on standalone algorithms. It has normally been used for putting harmonies in the original voice rendering process or deleting low-end rumbles for making the inside voice crisper.
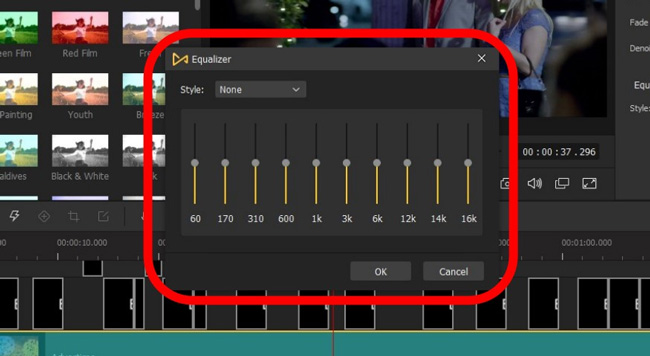
The most essential reason not to overuse EQ lies in the fact that all frequencies are detected in hertz and you should at least master which sort of frequency is problematic or should be improved before any small change in EQ. If you're not an experienced editor, your operations may perform a bad impact on the values of rumble or sibilance. It is the reason why VideMake and some pro video producers set ready-to-use styles for each purpose of audio equalization like for Pop or Dance.
3. Mask the voice that you do not want to showcase in the video result
You may need to trim out something from the voice track in your video like people coughs, mouse hits, headphone strikes, and garment frictions. If those clips show at the beginning or the ending part, that will be fine. But you’d better not cut out the middle parts because you will destroy the synchronization of the video and audio.
One of the good ways is to add some effects to mask the voice like using Laugh or Bleep to cover the indecent words, or you can extract the audio track from your video first, then split that video, lastly, mute the split part.
4. De-noise the background sound to a proper degree
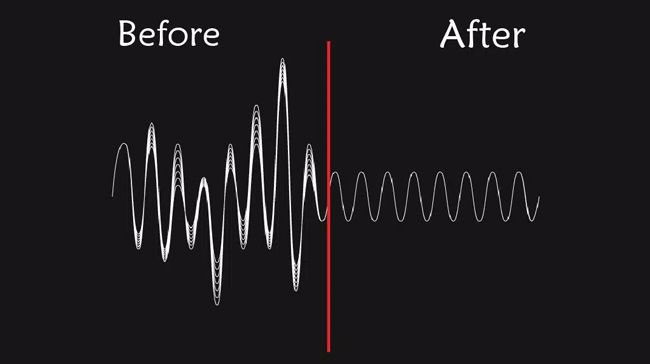
Even applying a professional mic or headphones there will still be breath and background noises that come from cars or else. De-noise background audio makes your video sound much better than the previous one. The sound of mouth, breath and even scream can be eliminated to some degree after the editing in your post-production.
5. Apply fade-in and fade-out effects to make music smooth
Any music with sudden emerging or dropping makes people uncomfortable because it is not as natural as it should be. If you want to make music sounds good, fading in and fading out belong to one of the skills you need to grasp at once, which smooths the "cliff-edge" reduction in volume or an unpredictable increase that may destroy the normal accept way of our hearing organ. But there are differences between fade in and fade out, usually, the former is set at the beginning of the whole soundtrack.
6. Know and touch up some advanced audio parameters
Time to learn more professional settings about an audio track. To list them one by one, you find format, volume, speed, codec, frame rate, output channel, resources, pitch, and sample rate. Those parameters make advanced improvement come into reality rather than simply adjusting the volume or speed to achieve the effect you think is excellent but actually, it is apparently not. A good video editor supports a sample rate of up to 480 kHz, a bit rate reaching 320 kbps, and both mono and stereo channels.
The Bottom Line
In fact, most voice-changing software or apps provide you with options to change the pitch for changing the voice. So you find it not possible to directly convert your voice to another style in high quality. More than that, you need to balance the volume and perform some advanced audio settings like bit rate and codec for reaching the best enhancement result.

