
Have you ever watched a baby cuddling a dog, making a funny face? It’s only a few seconds but it definitely makes your day. These videos are usually found on Instagram, or appear randomly in your YouTube recommendations. If these videos are funny enough, they go viral easily. And the good news is, you can now make your own vines and share them on social media for fun.
The making of a vine is easier than you might think. In the following parts, I’ll introduce how to make a vine video step by step using devices that you have currently.
How to Make A Vine
Making a vine is extremely easy, you can shoot your vine using your phone and do some editing with VideMake Video Editor. In this part, I’m going to show you a complete step-by-step tutorial on how to make a vine with your own devices.
Shot A Funny Video
Vine videos are all about fun. And the first and foremost principle of making a vine is you’ll have to do something funny. If you have no idea how to shot a funny video, all the popular vines on the Internet are the best examples. Or if you’re lucky enough to catch a funny moment and get it on your phone, you can directly use it for a good vine. And make sure that these funny moments are out of good intentions so that they can age like a fine wine.
Enhance Audio Quality of Your Video
Good audio is bound to make your video rocket faster than ever. But most of the time, the built-in microphone on your phone is far from good. The better solution is to get a USB microphone, connect it with your phone and record audio while you’re shooting videos. Or you can use a handy recorder to record sound while shooting videos, this will need more post-editing to replace the original audio with the one recorded with your recorder.
Edit Your Vine
Good vines are always short. Make your vines short enough and show the funniest moment with a split second is what vines are all about. Therefore, you’ll need an editor that can do the best job for you. With VideMake, you can directly import your footage and make a vine right away.
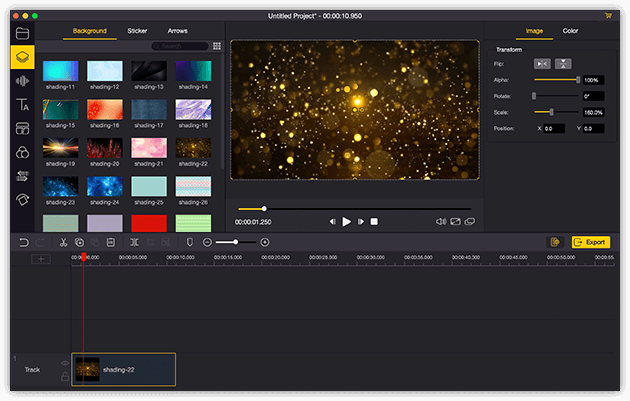
VideMake Video Editor is a versatile video editor that provides multiple effects and transitions. It comes with a screen recorder which can record images as well as the sound coming out of your computer. As a well-established video editor, VideMake is mounted with features like split screen, filters, animations, texts, and music library. The user-friendly interface comes with all the effects and tools you need to embellish your video.

VideMake Video Editor
Security Verified. 5,481,347 people have downloaded it.
- Basic and advanced features that make your video better
- Multiple filters, transitions, text, sound effects, music
- User-friendly interface
- Import as many photos or footage as you want
- Make a vine video in just a few steps
Next up, I'm going to show you how to make a vine video in VideMake Video Editor. Before you edit your video, make sure that you have already installed VideMake Video Editor on your computer, this software currently supports Windows and Mac systems.
Add Media Files to VideMake

Open VideMake Video Editor on your computer, then import your video footage to the media box. You can click on the import button to upload or directly drag and drop the media files into the box.
Add Media to the Timeline
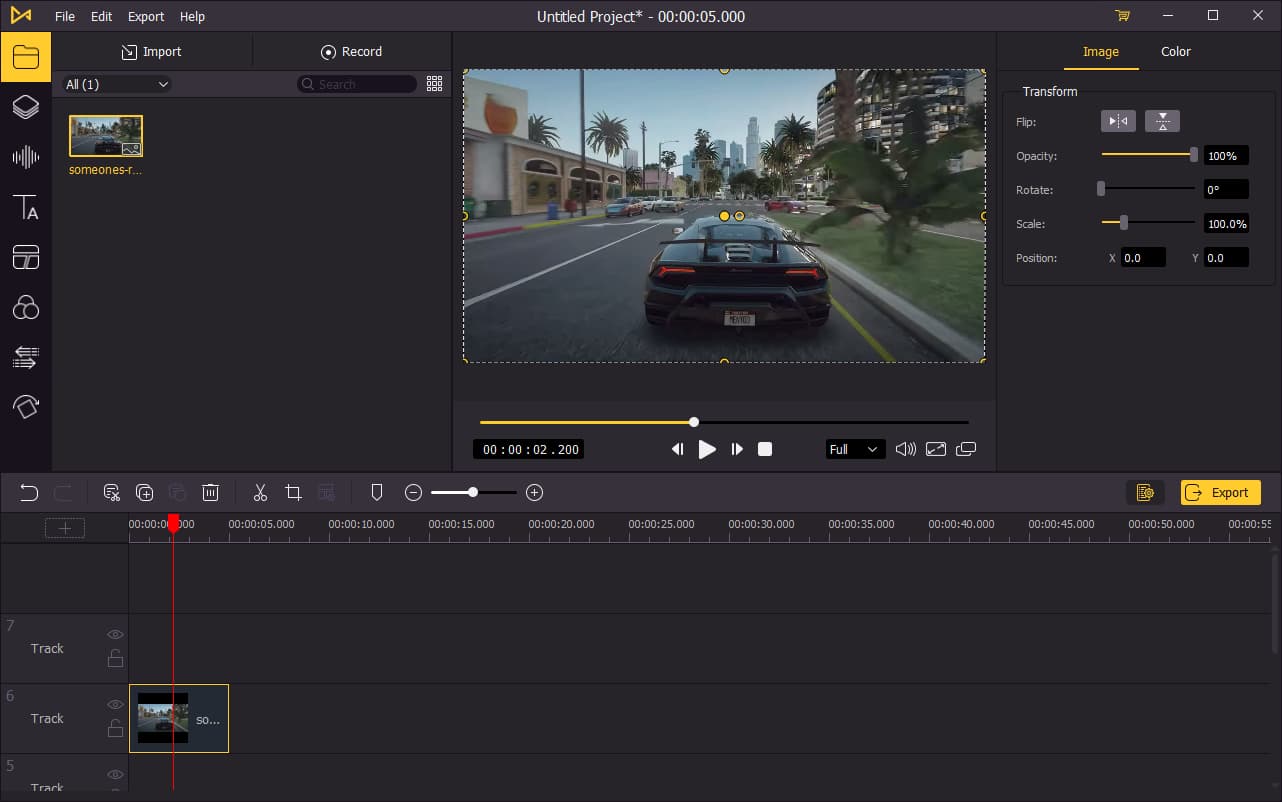
To add your media to the timeline, you can directly drag and drop them one by one. Or you can press Ctrl+A to select all the media files and drag them to the timeline. You may want to drag the slider above the timeline to zoom in/out the timeline so that you can edit your video more easily.
Trim Your Footage
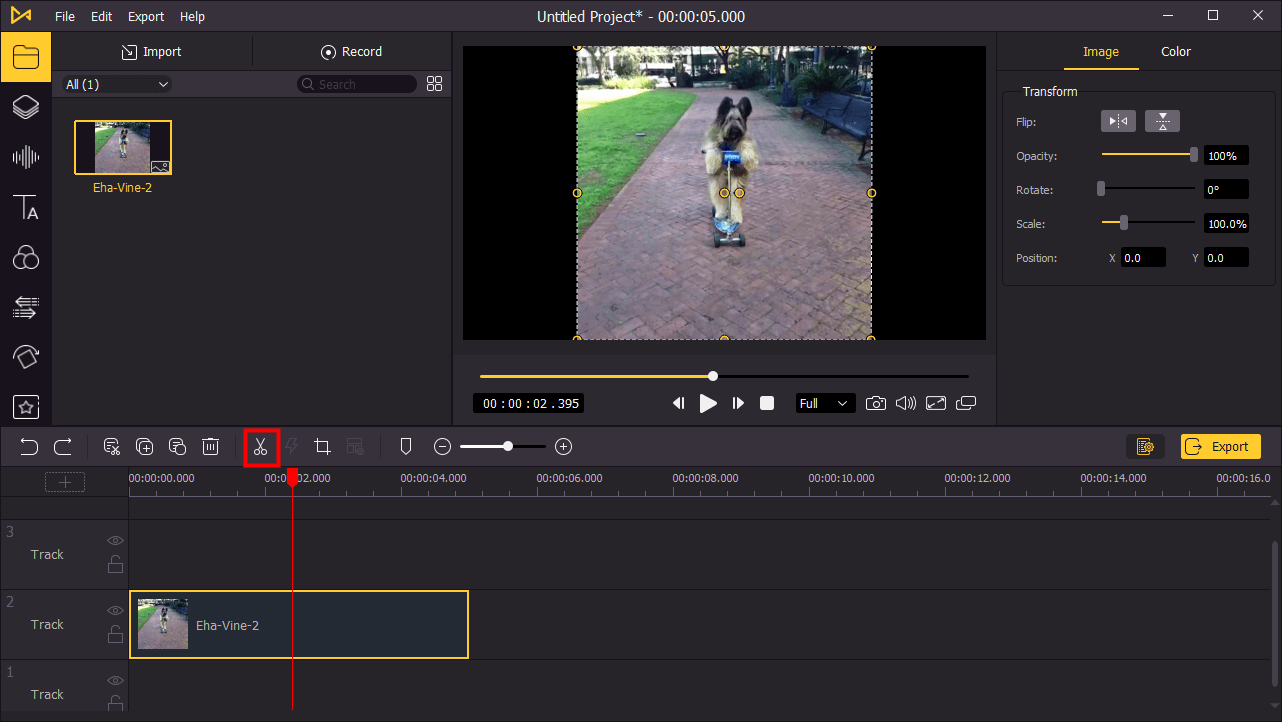
There must be parts that you don't want to be shown on your vine. The easiest way is to trim them. Move the playhead to the point you want to trim, then use the Split tool to cut the video. Then move the playhead to where you want to end the trim, click the Split tool again. Delete the part you have cut out. You might need to do this step several times to make your vine shorter.
Change Speed
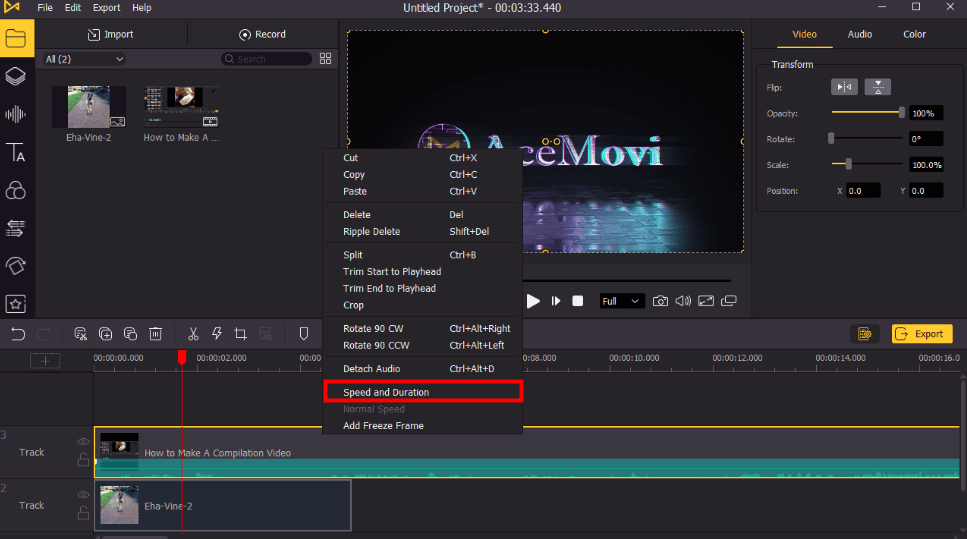
Changing the speed of your vine can make it even funnier. You can speed it up to make it more dramatic, or slower the funniest part to prolong the gold moments. Just right-click on your video on the timeline, choose Speed and Duration and change the speed.
Export Your Vine
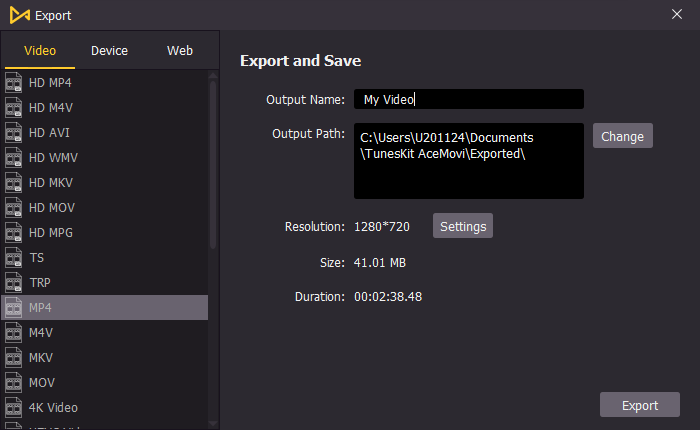
Once done editing your video, click the Export button on the middle left and export your video. Click the Settings, you'll be able to choose the output parameters. And by clicking the Change button, you can change the output location.
How to Make A Vine Compilation
If you're planning to make a vine compilation, you can also do this in VideMake Video Editor. One thing you should take note of is that a vine compilation requires a lot of clips that you may not have personally. However, you can make a vine by downloading clips from YouTube at yt1s.com. When you get all the clips you need, let's get started.
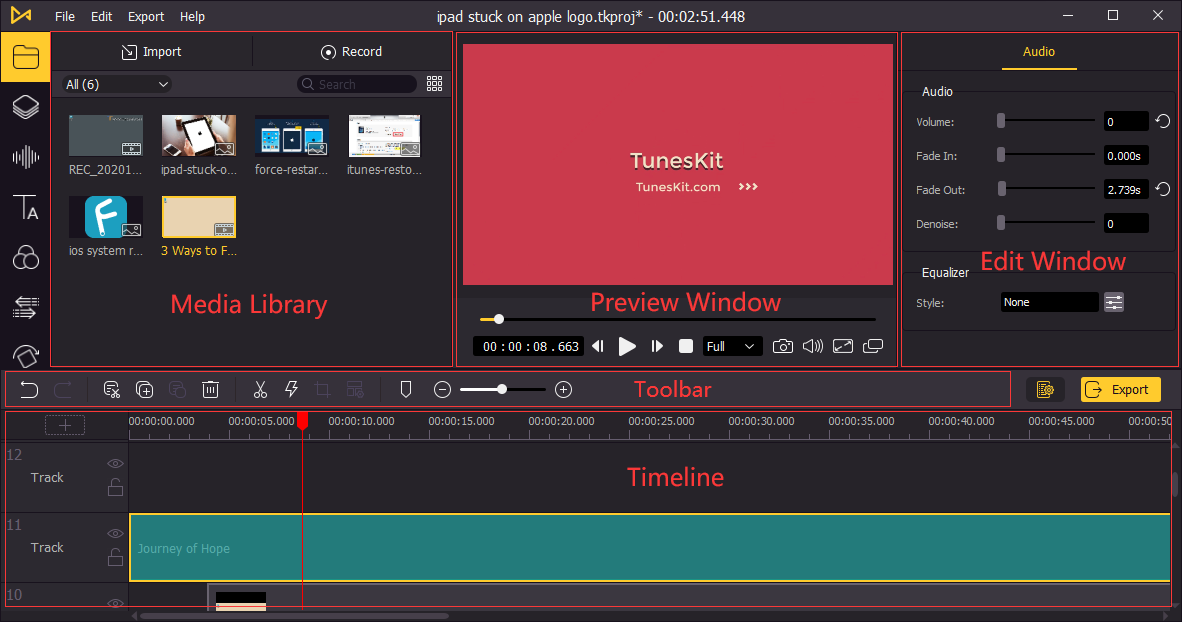
Step 1: Import all the clips in VideMake Video Editor and add them to the timeline.
Step 2: Add transitions in between every two clips.
Step 3: Add Captions to the vine compilation.
Step 4: Choose background music for your vine.
Step 5: Export the vine compilation.

