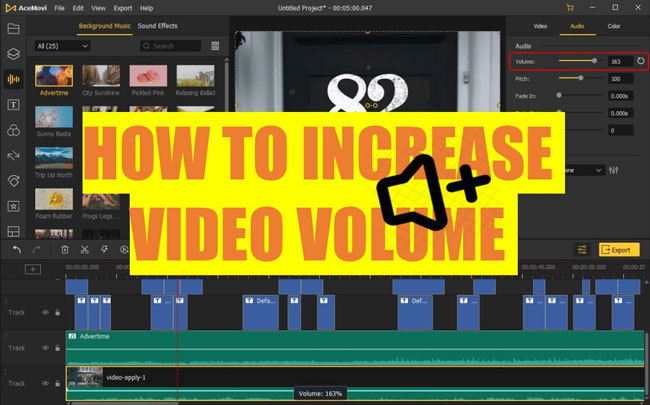
Photographers are very likely to come across the situation that they’ve already increased the video volume to the highest but still cannot hear the background voice. This can be one of the most frustrating experiences when making and editing a video because some information may be lost just due to the inability to hear the sounds, especially the video is of importance. If you’re wondering how to increase video volume and balance other video properties like pitch and denoise, just join us with this post. Today, we’re going to solve this problem and show you 2 efficient ways to increase video volume even in the circumstances that your video volume has been adjusted to maximum.
- Best Way to Increase Video Volume on PC & Mac - VideMake Video Editor [Discover!]
- Best Way to Increase Video Volume Online - Kapwing.net
- Comparison Table - Differences: VideMake Vs Kapwing.net
- Lastly
How to Increase Video Volume by VideMake Video Editor on PC & Mac
Many people record videos with their mobile phones, but editing it on a computer with a proper video editor may be the best option because the computer camera can help you preset the AutoFit format, resolution, aspect ratio, bit rate, and most importantly, the initial audio track and video volume.
And when it comes to the best video editor to increase the volume - VideMake Video Editor, a multi-functional & reliable video editor released for Windows and Mac holders could be one of the best candidates.
VideMake Video Editor is capable of increasing the initial volume in videos even to 200%, for another, it also can make this by using the built-in professional audio equalizer and denoiser as well. Furthermore, editing the videos and then exporting them in formats such as HD MP4, HD AVI, HD MOV, HD MKV, MPEG-1, MPEG-2, OGV, 4K Video, 3GP is very easy to realize with on VideMake. Sounds great? Just download VideMake to make what you want.

VideMake Video Editor
Security Verified. 5,481,347 people have downloaded it.
- Numerous text templates and sound effects available
- Conversion of the new video into most video formats
- Free try of Split-Screen, Slow-Motion, Mosaic, etc.
- Easy to navigate with the inclusion of best tutorials
- Numerous aspect ratios for exportation
- Low cost of subscription ($19.95/Monthly & $59.95/Perpetually are recommended)
Pros:
- Not for Linux
Cons:
Steps of Increasing Video Volume by VideMake Video Editor
VideMake Movie Editor allows you to do video volume editing work like adjusting the volume number, using an audio equalizer, normalization of the audio, etc. And you do not have to compress and detach the audio track before adjusting the volume. If you want to normalize the audio, you can try the two easy means: equalizer and denoiser.
Besides, with VideMake, you do not need to concern yourself about the loss of video or audio quality and any rendering lag even if it is multiple files. Below, you will learn how to do certain things using the software.
Download VideMake
You have to make sure that VideMake has been downloaded on your desktop successfully. In this case, you can choose the option of clicking VideMake’s logo and run it directly.
Import Videos
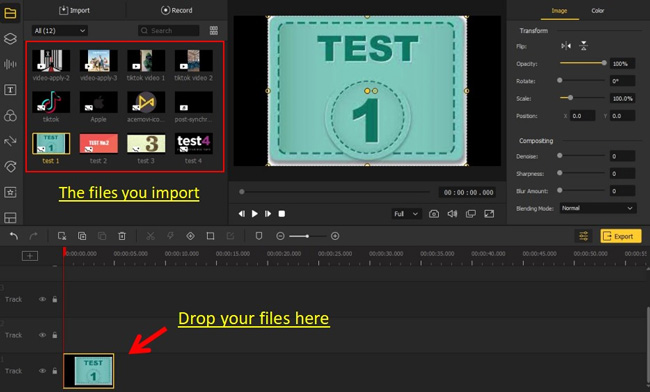
To import, you should drag the video from your folder and drop it in the designated place - Track.
Tips: Another way is to use the Import icon option by right-clicking and selecting the video you want to import from your folder. And then select the Add to Timeline choice to import it. Besides, the clips you’ve put into Track 1 will cover Track 2’s.
Commence Video Volume Increasing on PC & Mac
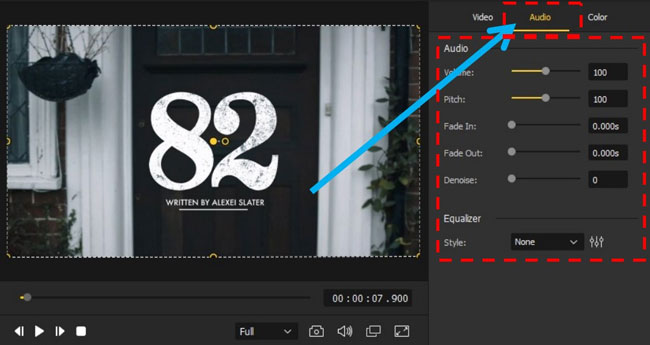
After importing clips to your timeline, you will need to select the audio properties shown on the right above to commence editing the audio. In the following, you’ll see 3 tips to increase video volume and make your video hears better.
Way 1. Here you will see a slider in the first line used to increase the video volume to 200%. Just slide it to the right and check the effects by playing the video in real-time.
Way 2. You can also find a very pragmatic video editing tool - Video Denoiser, which can be used to increase the sound output quality of the main audiotrack by removing needless ambient noise as well as human noise. And the denoising number can be controlled between 0 to -200.
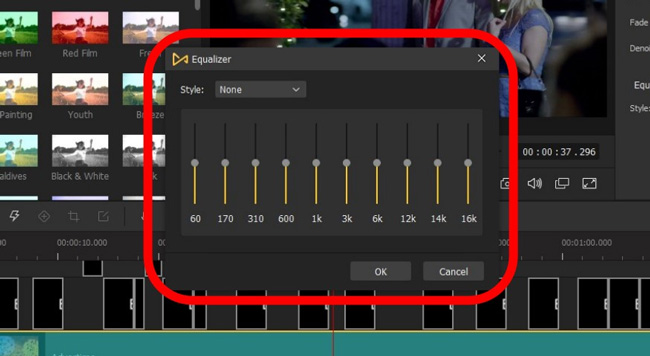
Way 3. VideMake has some presets options you can select from the Equalizer, for example, Dance, Soft, Pop, and Blue styles. There are ten audio equalizing chains and you can adjust each higher or lower to make video volume increase.
Export Volume-Increased Video
Well done! You just made it. In the last step, you can download the video by going to the Export page. In fact, exporting videos on VideMake is very easy and just depends on the device's compatibility. And there are numerous formats you can convert into like MP4, AVI, MOV, MKV, MPEG-1, MPEG-2, OGV, 4K Video, 3GP, 3GP-2, etc.
How to Increase Video Volume by Kapwing.net Online
Apart from increasing video volume on your PC/Mac, you can also make this adjustment online. Kapwing.net is a tool that allows online editing of audio with great ease, and you even do not need to pay a dime.
However, there are also some requirements before using this online tool: Firstly, registering in to get an account; Then, getting a nice internet environment; and Lastly, paying $24 monthly or $192 annually to get the service of 1080p+ resolution, 6GB uploading, & 30+ minutes without watermark. Now, let’s see how to increase video volume online by Kapwing.net.
Import Videos
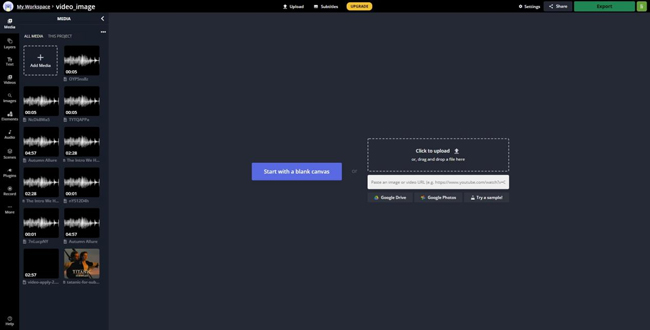
After locating where you stored the video, you can upload it to Kapwing to start your editing. First, click on the Get Started option on Kapwing.net, which will automatically redirect you to the studio. Next, click on the upsload icon, which will take you to the file browser to select where you saved the video.
Tips: Simply drag-&-drop is supported when importing video clips.
Also, you may want to use video for social media platforms like YouTube, Instagram, and Facebook. In that case, just copy the URL of the video and paste it under the URL box.
Begin to Increase Video Volume Online
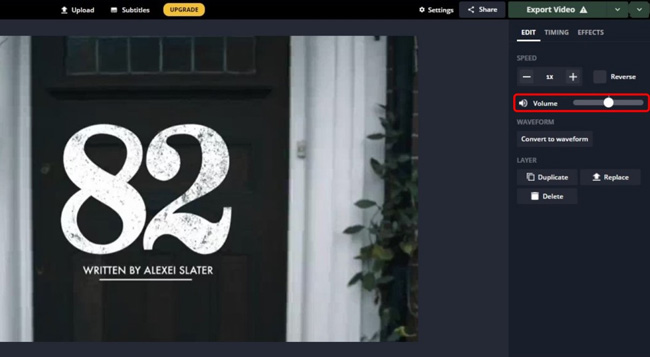
You can increase or reduce the volume of the video by selecting the audio layer and moving the slider to edit the sound level. Also, you can adjust the volume by dragging the pink line in the timeline.
Export Volume-Increased Video
To download the video you just edited, you should: Go to right above to click the Export Video option > You can unfold its dropdown container to select export as MP4, GIF, Image, MP3, etc. > Export at 720p > Download it on desktop or share by URL.
Bottom Line
In the following, we've listed some of the ins and outs of VideMake Video Editor and Kapwing.net Online Video Editor. You can compare them from the aspects like operating system, user interface, volume degree, pitch adjuster, and more.
| VideMake Video Editor | Kapwing.net Online Video Editor | |
|---|---|---|
| OS | Desktop (Windows XP, Vista, 7, 8, 8.1, 10, 11; Mac 10.8 and higher) | Online |
| UI Style | Streamlined(Unlimited Tracks) | Streamlined(Limited Tracks) |
| Volume Increase Degree | 0%-200% | 0%-200% |
| Pitch Adjuster | √(1%-199%) | × |
| Volume Fade in/out | √(0-300s) | × |
| Denoiser | √(0--200) | × |
| Audio Equalizer | √(10 lines) | × |
| Audio Style | √(12 genres) | × |
| Pricing | $59.95/P, $39.95/Y, $19.95/M | No Perpetual-Plan, $192/Y, $24/M |
| Video Templates | Fewer | More |
| Text Templates | More | Fewer |
| User Experience | Easy | Easy |
| Music Templates | Fewer | More |
| Advanced Effects | More (Split-Screen, PiP, Reverse, Mosaic, Blurring, slow-motion, etc.) | Fewer |
Bottom Line
We believe that both the desktop method and the online method can be very helpful in increasing video volume. Respectively, if you selected the desktop (PC/Mac) method on VideMake Video Editor, you can also increase improve audio-track quality by the built-in pro denoiser and equalizer. But when you’re planning to increase video volume without any software downloading, Kapwing can be one of the best answers for you.

