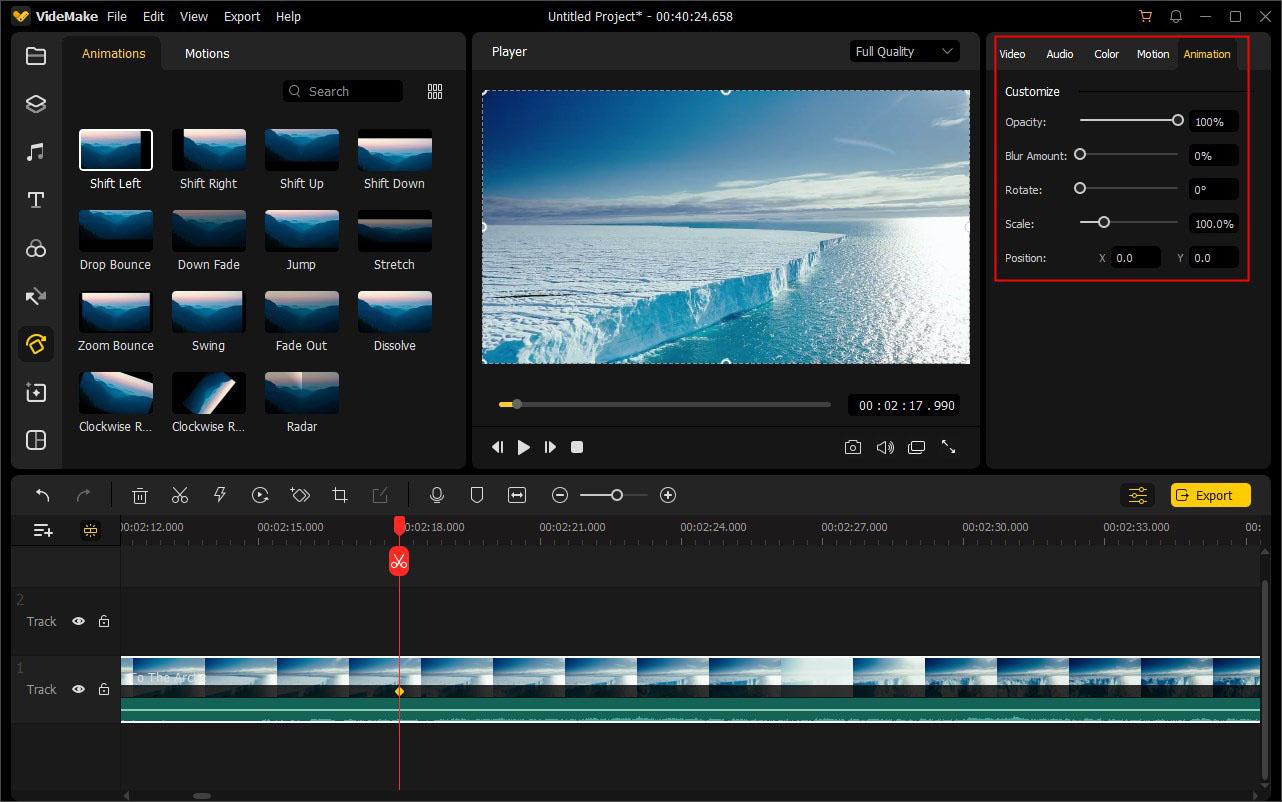
The keyframing feature in VideMake enables you to create customized animations by yourself. To animate a property, you have to change its value over time. You can use a keyframe to specify a value, such as scale, spatial position, opacity, and rotation.
To create an animation, you have to set at least two keyframes. One keyframe is for the value at the beginning of the change, and another one is for the value at the end of the change. The following is how to create keyframes.
Import a video clip, image, or motion element to the Media Library. Then drag your target file to the timeline. Click on the video clip and move the playhead to the position where you want to add a keyframe.
Next, choose the Keyframing icon ![]() in the toolbar to add a keyframe for the beginning of the change. Press the Properties icon
in the toolbar to add a keyframe for the beginning of the change. Press the Properties icon ![]() and you'll be able to adjust the effect property's value under the Animation tab, including opacity, rotate, scale and position.
and you'll be able to adjust the effect property's value under the Animation tab, including opacity, rotate, scale and position.

Then, move the playhead again to the second point where you'd like to add a keyframe for the end of the change. And repeat the steps above to adjust its value and create your own animations.
In addition, there are some preset keyframes in VideMake. Just go to the Animation menu ![]() on the left sidebar and choose the Motions tab. You can choose any keyframe you like and drag it to the media file you want to add. Then you can adjust its starting point and endpoint to meet your needs.
on the left sidebar and choose the Motions tab. You can choose any keyframe you like and drag it to the media file you want to add. Then you can adjust its starting point and endpoint to meet your needs.
If you don't need a keyframe, you can easily remove it from the timeline. Click on the clip that has applied the keyframe, and select the specific keyframe, hit the Delete icon ![]() in the toolbar, or press the Delete button on the keyboard to delete it. Repeat this step to remove all the keyframes you no longer need.
in the toolbar, or press the Delete button on the keyboard to delete it. Repeat this step to remove all the keyframes you no longer need.